
Start work in a quarry or stone yard and choose the stone for the table. Look for something proportional in size to a coffee table:about 3 feet long, 2 feet wide, and 2 inches thick (Image 1). When choosing a stone, choose the color and character, but also make sure the stone does not have any cracks or blemishes that will compromise the strength of the tabletop. Carefully transport the stone back to the job site and place it on a platform or bed of sand. This will provide adequate support for the stone piece as you work on it.
The base of the coffee table can be made of almost anything, as long as it is capable of supporting the heavy stone top. Options include an old coffee table base, a tree stump, and interesting scrap finds. If you choose the latter, head to a junkyard to find material to create a welded steel base. Look for structural steel to weld. You don't want aluminum, stainless steel, or cast iron. A piece of schedule 40 pipe (Image 2), a disc plow base, and leaf springs from an old truck are an example of a good choice.


To get the stone in the desired shape, use a stone hammer and a carbide chisel (Image 1). If you want a more geometric shape, you can choose to use a circular saw or grinder to mark out the initial shape (Image 2). When molding, you can freestyle with the hammer and chisel or score the design with a piece of stone or chalk.
The smaller the section you are trying to take off at the same time, the better. The larger the section you are trying to remove, the more likely it is that the stone will break off in an unexpected place.
Further control the chiselling process by undercutting:trim the bottom half of the edge with the stone hammer and chisel before chiselling the top line. Trimming reduces the amount of stone you are cutting, which makes for more precise cuts.
Once you've chiseled out the shape of the stone, follow up with a lighter hammer and a carbide finishing chisel to remove any sharp edges. Always wear safety glasses when chiseling.


The stone top can be finished whenever you achieve the desired look, but you can choose to add artistic elements to the stone top. Draw the design first in chalk, and follow the chalk lines with a saw or grinder, scoring them about an eighth of an inch deep. A circular saw with a diamond blade is best for straight lines and a grinder for curved lines. If you want the dotted lines to be wider, go over them a second time.
The next step is to add a colored stone inlay to the pattern. The inlay is made up of crushed stone, epoxy and hardener and can be obtained from specialty craft stores (Image 1). Mix the embed and spread with a syringe (Image 2). Run the syringe slowly into the slots and try not to overfill. If adding a color, make sure the powder is finely ground as it must travel through the narrow passage of the syringe. Allow the inlay to harden before doing any additional work on the stone, which takes approximately four hours depending on the product used.

Stone cover can be left uncovered, but some stones stain easily and all absorb water. You can seal the stone for a natural finish or apply a clear resin to give the surface a shine.
Elevate the stone on plywood or scrap wood. Pour the clear resin over the stone, spread and smooth with a tongue depressor, letting it drip over the edges. The resin can be spread on the edges with a tongue depressor or brush. Let the resin dry completely before moving the table.


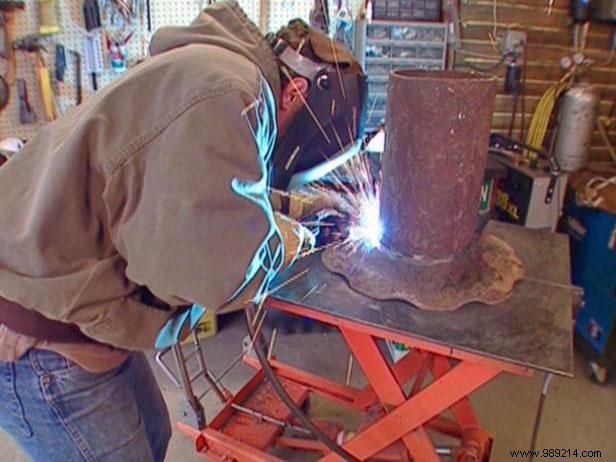
With most of the work on the stone table complete, the last major phase of the project is creating the metal base and finally attaching the top to the base. For this piece, the base is created from various pieces of metal salvaged from a junkyard:a piece of Schedule 40 cylindrical pipe, a plow disc base, and leaf springs from an old truck. Unless you are experienced in welding techniques and safety, take your design and metal to a welding shop or create a different type of base.
You can choose any height you want. Cut the tube to size using a hacksaw with an abrasive blade (Image 1). Smooth and remove rust from the cut edges of the pipe. Do the same to the base of the plow disk by tracing the area where the tube sits and then clean off the rust in a ring. When welding the tube to the base of the plow disc, the clean metal should be on top of the clean metal.
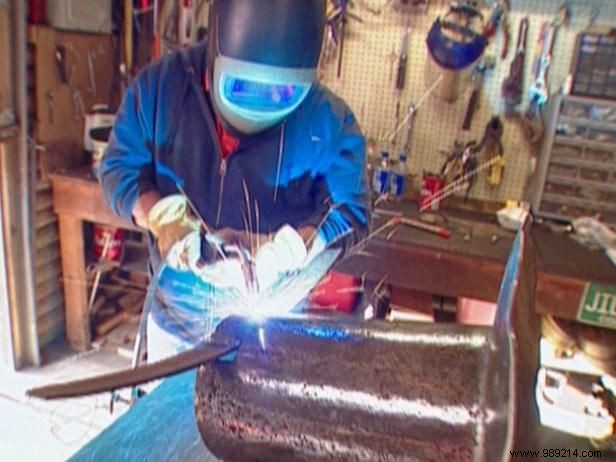
Make sure the tube is level on top of the base. This is where a magnetic level comes in handy. If you need to make adjustments, use whatever you have, like knives or chisels, to hold it in place until the pieces come together. Tape the tube to the base to hold it in place, then weld the entire base in sections (Image 2). Once the two pieces are welded together, clean off any old rust on the new base (Image 3) using an angle grinder and grinding stone.
The base is almost complete, but needs something to provide support along the heavy table. Place two almost parallel steel strips on the tube part of the base to obtain this resistance. Using a hacksaw, cut out the leaf springs from an old truck, cut two notches on each side of the pipe with a plasma cutter (Image 4), and fit the springs into each notch. Level the springs, cross them out, then weld everything in place.

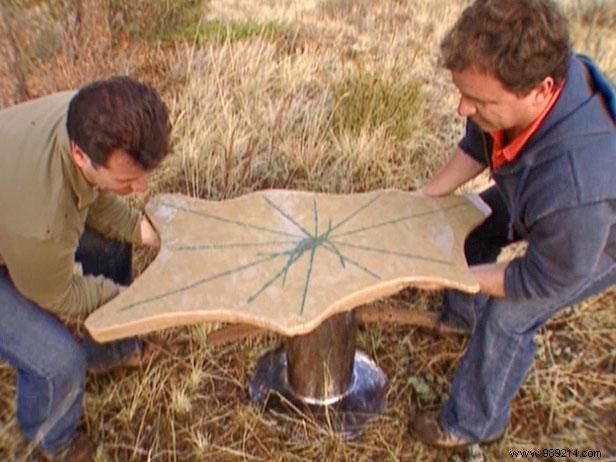
With the foundation complete and the stone dry, the last step is to lay the two together. The result is a stone coffee table with the strength of steel and the beauty of stone..