
This table is constructed from an old game table and repurposed legs with wheels. When using reclaimed and vintage materials, always save scraps and drips to reuse for other projects. Lastly, check the materials for cracks and any other structural damage.
To attach the new base to the top, you'll also need a piece of 3/4" plywood and some salvaged 1x8 material to form the skirt.


With the old top upside down, determine the best place to mount the new base skirt. Find the underlying structure with enough material to drive the wood screws through. The top shown was framed with an underlying square (where the legs folded down) which was an ideal place to attach the base. Cut a piece of plywood 3/4" 1-1/2" smaller than the base skirt but still large enough to fit into the underlying structure. Attach plywood with 1-1/2" wood screws at least 12" on center. Next, cut two pieces of reclaimed 1x8 to the same length as two opposite sides of the plywood. Coat the edge with wood glue and nail it to the side of the plywood with 15-gauge nails.
Cut the remaining two pieces of 1x8 to the outside dimension of the two sides that were just attached. Check the top and bottom width of the side pieces with a tape measure and square frame to make sure they are parallel. Lightly push or pull each side to make it square with pieces three and four before laying it down. Cover three edges of these pieces and shoot with finished nails.


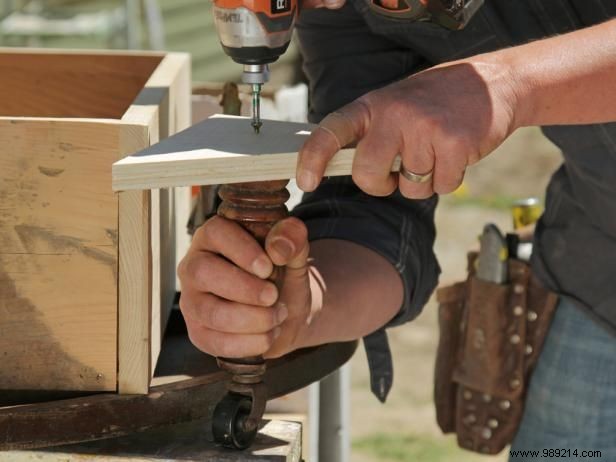
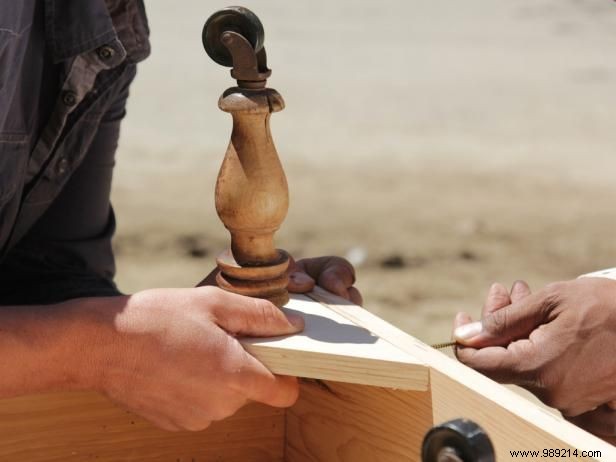
To attach the four table legs, cut four 6" triangle gussets from the remaining 3/4" plywood. The leg style will determine the mounting method. For the table shown, the top was wood glued to the top of the leg; a 3" #10 wood screw was driven through the brace in the leg. The mounting method must be secure enough to prevent the legs from shifting when rolling. Some legs may have a threaded rod at the top, which would be a great way to attach it to the bracket.If the diameter is big enough, put two screws into the top of the legs.
Depending on the mounting method, it may be easier to attach the brace first. To attach the bracing, coat the two 6" edges with wood glue and drive two 1 1/2" #8 wood screws through the 1x8 on each side.
There are several options available to finish this coffee table, such as painting, staining, and waxing. For the table shown, the 1x8s were planned. Much of the original texture and patina still existed below the surface of the wood. A furniture polish was used to protect and enhance the color of the table base. The legs and top did not need any additional finishing. If you choose to sand and repaint or repaint, be sure to check for any possible lead-based paint first. See EPA Renew Right:Important Lead Risk Information for Families, Child Care Providers, and Schools brochure for further guidance.