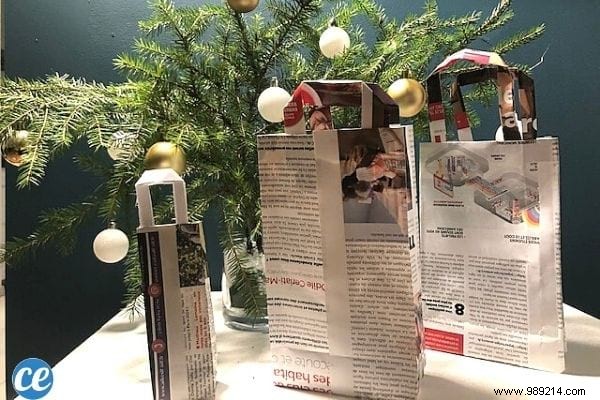
Gift wrap has a very short lifespan!
It quickly ends up in the trash...
So why not recycle old newspaper to make a nice gift bag?
It's perfect for recycling the advertising flyers that we receive in our mailboxes.
And don't worry! These colorful gift bags made with newspaper are easy to make and cost nothing.
So, don't throw your brochures and old newspapers in the trash! Turn them into a gift bag. Watch:

- newspapers or flyers
- glue or tape
- scissors
- cardstock that can be from an empty cereal box
1. Take a rectangular sheet of newspaper and lay it horizontally in front of you. Double it if the paper is too thin.
2. Make a fold of about 2 cm on one long side. Do the same on a short side.
3. Glue the fold on the long side. Turn the sheet over so that this crease is at the top.

4. Fold the sheet in half widthwise, bringing it edge to edge on the short folded side. Glue this fold to the edge you just brought.
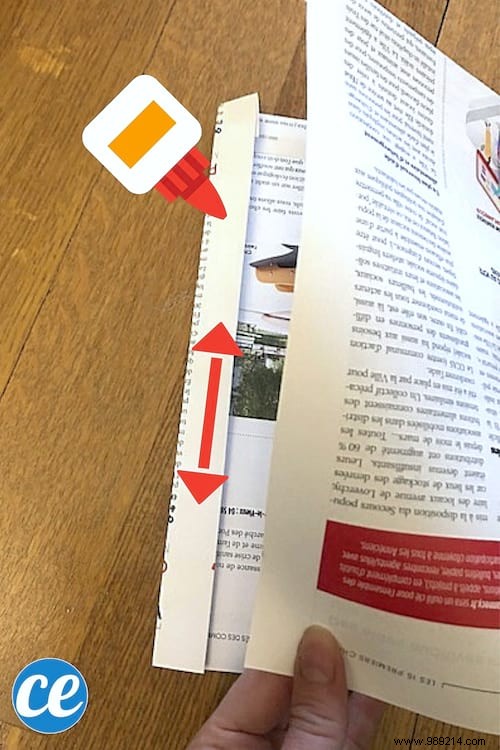
5. Open so that the fold you just glued is in the middle of the bag and not on one edge of the bag. Flatten the sheet again. You get a rectangle.
6. Lay the sheet in front of you. To form the bottom of the bag, fold the bottom about 1/3 the length of the rectangle.

7. Fold the top corners of this flap into a triangle to bring them to the edge of the rectangle, like when you wrap a gift. Insist well on this fold.
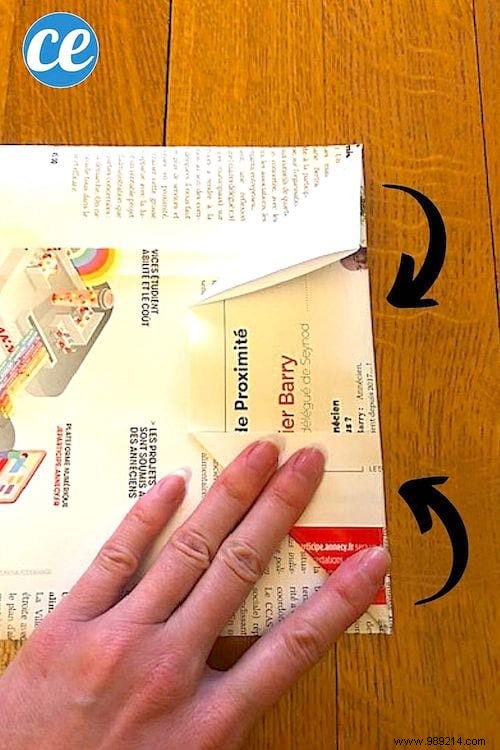
8. Open this part (the bottom of the bag), it looks like a kind of boat.

9. Fold inwards the folds on which you have just insisted. This forms a new triangle.
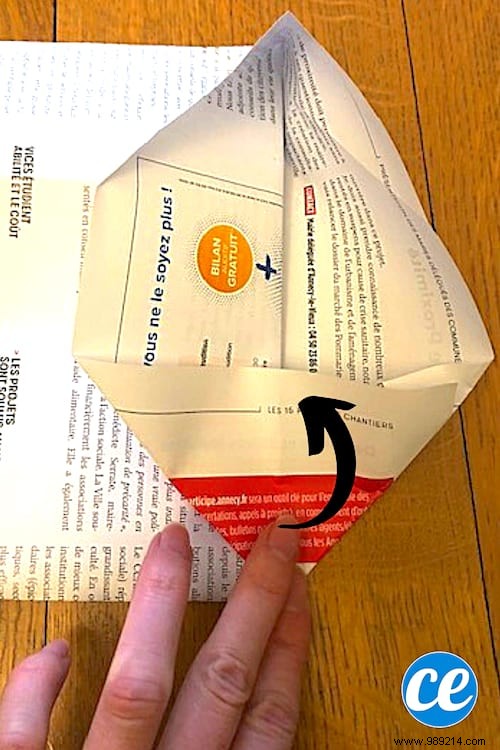
10. Do this for both sides to get a bottom.
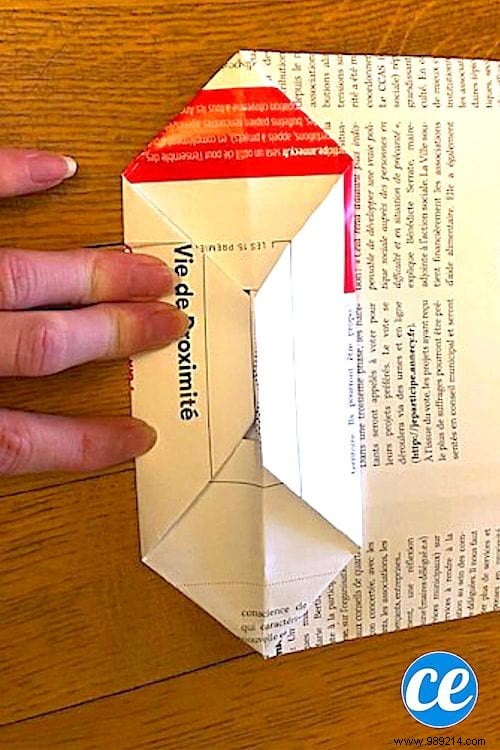
11. Once these two sides are folded, fold down the remaining wings, folding them towards the middle and overlapping them slightly. Tape or glue this part. The bottom of the bag is ready.
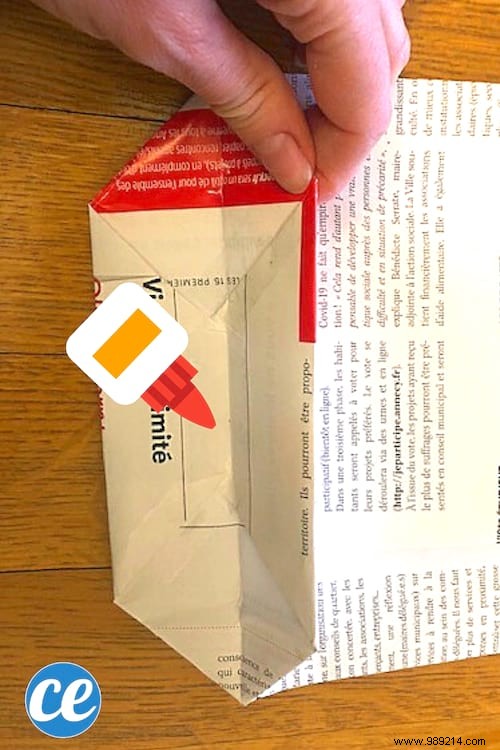
12. Turn the bag upside down and open it so that it takes on its rectangular shape. You can mark the folds on the 4 corners if you wish.

13. For the handles, cut 2 strips of paper and fold them in half.

14. Put the two strips on top of each other to make it easier for you and fold about 1/3 of the strip at 90° on each side.

15. Glue the handles inside the bag.

16. Take the card stock, cut out a rectangle the size of the bottom of the bag and put it inside the bag to reinforce the bottom.
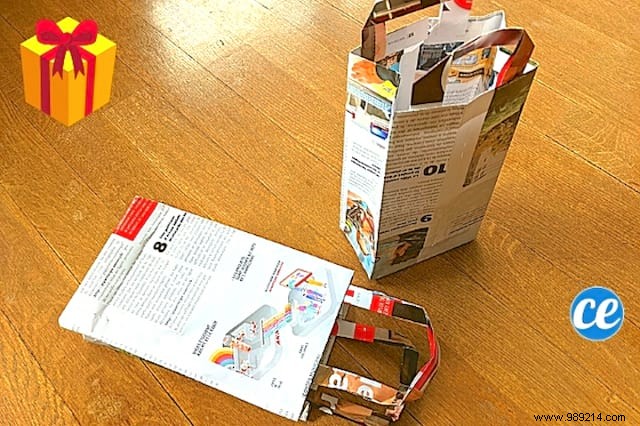
And There you go ! Your homemade Christmas gift bag is already ready!
Easy, fast and efficient, right?
All that remains is to fill it with a nice gift.
You can even stick out a paper napkin or tissue paper to "dress" your gift.
Making the first bag takes about 10 minutes, but once you get the hang of it, it's child's play!
You can make them in all sizes. Perfect for fitting hard-to-wrap gifts like bottles or small items.
And why not decorate the bags with colored tape or some glitter?
My advice:the more colored the paper, the prettier the result.
