Before tearing up your old tapestry and embarking blindly on gluing your new wall decoration, find out about the techniques for installing panoramic wallpaper . Here are our tips of the day.
Indeed, today Scenolia reveals all the solutions and practical tips for the best possible installation of your new tapestry.
Again very trendy for a few years, wallpaper in rolls or one-piece has regained its place in the house. In your living room, your bedroom or in your kitchen for example, it is important to know how to choose it well so as not to regret a few months later. Take a look around here, Scenolia offers hundreds of panoramic wallpapers.
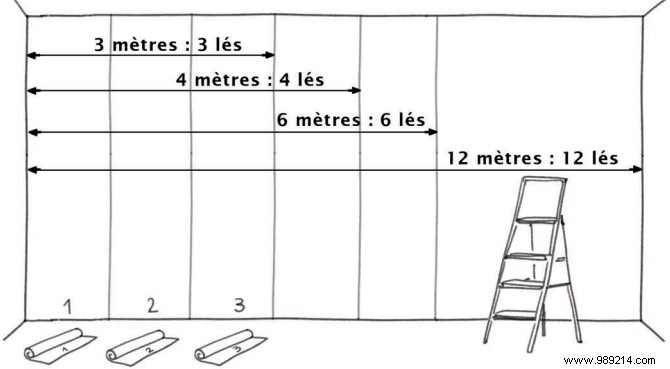
The advice that we are going to give you now for installing your wallpaper correctly, applies to wallpaper in strips and one-piece pieces of 3 m, 4 m, 6 m or even 12 m.
Anyway, let's get to the heart of the matter. Once you have chosen your panoramic wallpaper (on Scenolia of course 😉), it is very important to be well equipped. The minimum tools to have are:
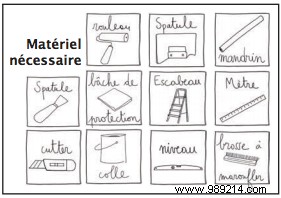
Scenolia offers you all the accessories you need to install your panoramic wallpaper without worries.
Put on your overalls, let's get started!
If your wall is in good condition, or has been maintained before, you can skip this first step and move on to the second. This was the case in our offices. Discover here, the office decoration to successfully install your wallpaper.
It is important to take some precautions. Above all, do not damage your floors and bring a large plastic sheet or a large sheet and spread it over the entire surface.
You must first give a second life to your walls. They deserve a little maintenance. Indeed, it is normal that after a few years, the walls deteriorate. Then fill in the holes with specialized products that can be found in DIY stores (ask the staff so you don't go wrong). Thus, the spatula will be necessary for you to remove the old upholstery residues and a stepladder to reach the defects in height. For those who have more courage and patience, you can sand your walls for a final rendering of excellent quality.
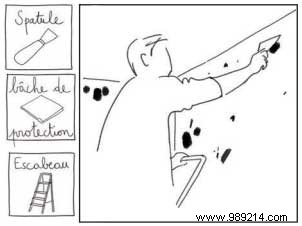
Tips: Do not forget to remove the socket and switch covers. It will be easier for you to hang your wallpaper if everything is already ready.
First of all, for the installation of a panoramic roll wallpaper , calculate the total width of your wall, as well as the number of strips you need (all Scenolia strips measure 100 cm and are numbered from 1).
Then start from the end of the wall and calculate the indicated length. Make yourself a benchmark (a dotted vertical line). We advise all our customers to use a level. It's easier and above all more practical to lay a straight length.
In addition, a plumb line can be used, which is less bulky and just as easy to use as a level.


Tips: your first length is the starting point of your panoramic wall. By starting with a diagonal strip, your whole visual will be offbeat, so be careful! Don't worry, the manipulation is not difficult, you just have to do it seriously.
For the one-piece panoramic wallpaper , the step is almost identical. You must first calculate the height and then the width of your wall. Take your one-piece wallpaper. It is wound around the mandrel (support provided in delivery). Unroll your future image and cut your support at the bottom or top according to your preferences. Then cut your chuck to the desired height. A utility knife should do the trick. If you are well equipped, you can use a small saw for simplified cutting. Wrap your image in the mandrel again and make sure it is tight enough.
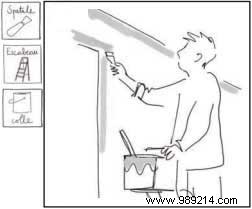
Tips: it is important to always follow the height of the ceiling and the left side, which is the first section of the wall, to have a straight visual.
The pre-gluing is one of the most important parts of hanging your wallpaper. This step is common to roll and monoblock wallpapers .
Using a fine brush , start by applying the glue along the doors, in the corners, along the baseboards... You must do this work carefully and must be careful not to forget any place, this will make your task easier for the future.😊

After the "sensitive" contours are finished, it's time for you to cover the remaining surface of the wall. In this case, Scenolia suggests using the glue roller . Large, it allows you to cover a large area quickly. Start from the top and go down as you go. Perform various gestures with vertical and horizontal roller strokes. For the installation of a strip wallpaper, simply plan to glue the wall 10 to 20 cm greater than the width length (100 cm). For a one-piece panoramic wallpaper, we advise you to glue a third of the total width of the monobloc.


Tips: don't skimp on the amount of glue to apply, you can then remove the excess with a damp sponge.
Once the area is completely covered with glue, you can present length n°1 to the wall . Start from the upper left corner and walk along the wall. Adjust your length according to the line you have marked beforehand. Repeat this step with the following lengths until you get a plain wall.

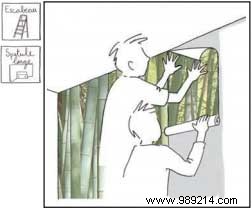
Tips: be careful to be very precise, all the final rendering of your wallpaper is played here! 😉
To better understand, take inspiration from our video on the installation of a wall paper.
For the one-piece wallpaper , the handling is almost the same. It is important to be in pairs. When one of you places the wallpaper in the first corner, the second holds the mandrel and pulls lightly on it, in order to stretch the wallpaper as much as possible without damaging it. Once the first third is glued, use a smoothing brush to remove all the air bubbles present under the wallpaper and spread the glue as much as possible. Repeat this step 2 times to position the second and the last third.

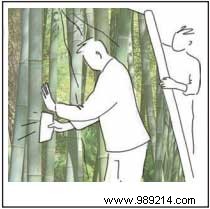

Tips: be careful not to forget a place where the excess glue is present. After a few minutes, the glue will fix the material to the wall and may leave a small visible cell on your wallpaper.
Take the help of our one-piece wallpaper installation video to better visualize the techniques used.
For wallpaper rolls , it is essential to smooth the support to drive out the air bubbles. In addition, you evacuate the excess glue, still present under the wallpaper. With a damp sponge, gently go over each strip transition and at the same time check that all the strips are well joined together. If the glue is not completely dry yet, you can reposition your non-woven.

Finally, this last step applies just as much to panoramic wallpaper in lengths as to one-piece wallpaper:for a clean, smudge-free final result, use a cutter or a spatula to remove the excess paper. No creases should be present to avoid the risk of cutting the wallpaper askew.
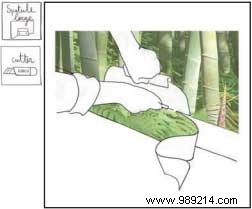
Tips: preferably use a new cutter or spatula blade . This will facilitate your approach and allow you to have a totally professional rendering.
This is the end of this little tutorial. Send us your Scenolia decoration photos and we will publish them in our #Showroom space to inspire future people. You will also receive a 10€ voucher on your next order
Courage and good decoration! 😉
SaveSave