The headboard cover method uses just one large piece of fabric, two side seams, and a hem. Measure your headboard. Our twin size headboard measures 44-1/2" wide x 18-1/2" high x 2" deep.

Calculate the width and length of the fabric needed with this formula:add the width of the header front + 2x the seam allowance (we used 1/2" seams) + the depth of the header. Ours was 44- 1/2" + (2 x 1/2") + 2 =47-1/2" and we round up to 48" wide. The formula for length is as follows:Add the height of the front header + the height of the back header + the depth of the header + two hems. Ours was 18-1/2" + 18-1/2" + 2" + 2" + 2" =43". Now it's time to cut the piece Ours was 48" x 43". Note:Because we used a fabric that was only 45" wide, we chose a pattern that could be rotated 90 degrees and still look good. This lets us skip a step of gathering the fabrics. (If your headboard is large or your fabric pattern would not look right turned 90 degrees, then you can gather the fabric.) Alternatively, you can follow our custom headboard cover method and simply add the pocket from this tutorial.

With wrong sides together, sew the left and right side seams of the headboard cover with 1/2" seams. We sew the headboard cover first, then add the storage pocket. Depending on the size of the headboard and Wherever you want to place your storage pocket, you can choose to add the storage pocket before sewing the side seams.

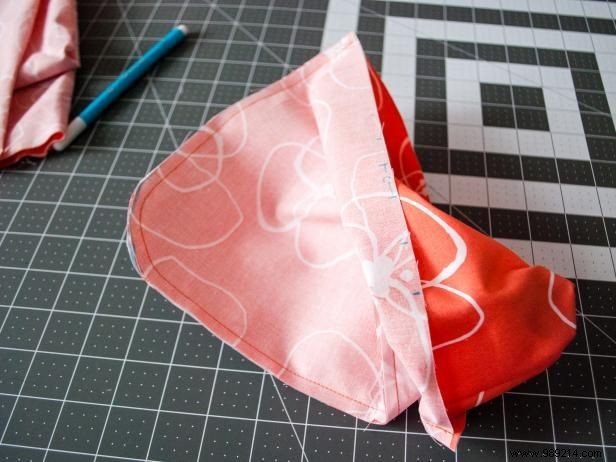
Press the side seams open and slide the cover over your headboard, wrong side out. You will see a triangle forming at the top of each side. Pin the base of the triangles.

Remove the headboard cover, sew the triangle and press. This will help the corners lay flat. Tip:Use a piece of painter's tape to sew a straight line. Repeat on the other side.

Fold up the raw edges of the bottom hem, iron, and then sew. We turned our hem 1" and then another 1", ironed it, and then sewed it to the correct height.

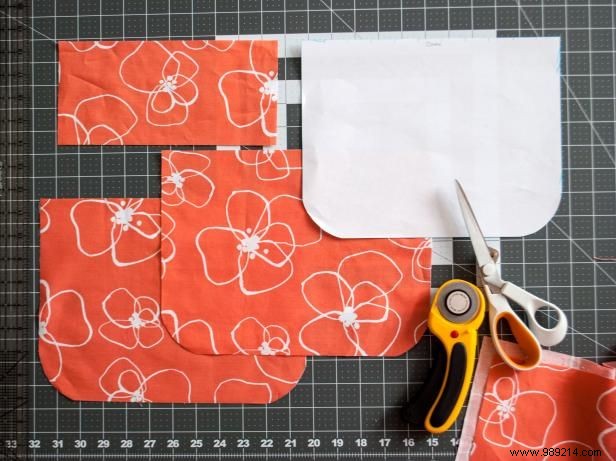
Determine the desired size and location of your pleated storage pocket. Our finished pocket was approximately 9" at the opening x 11" at its widest point. Cut two rectangles for the front pocket and the back pocket. (Ours was 8-1/2" x 11"). Round off the bottom two corners by tracing around a glass or other round object, and then cut out the fabric. Cut a piece of fabric for the top face pocket. Ours was 4-1/2" x 9-1/2". Here's the formal calculation for the top face:For the height, calculate 4x the desired height. (Ours was 4 x 1", so 4"). To calculate width facing up, take the width of the pocket (ours was 11") and subtract 2" for the pleats + 2x the pocket seam allowance. (We used a 1/4" pocket seam allowance, so a total of 1/2"). Optional:If your fabric is thin, cut out a sewing interface piece.

Mark the center inch of one of the pocket pieces along the top flat edge (not rounded), then mark two more inches on both sides of the center.

Sew front pocket to back pocket with a 1/4" seam, turn right side out, then press down.

Fold the pocket by matching the line on the far right to the next line, fold it over and pin it. Repeat on the left side of the pocket. The center will be three inches long. Set aside.

Iron the two raw pocket edges facing each other so they meet in the center.

Fold the pocket in half so that the folded edges are together on the left and the raw edges are on the right. Sew the two short sides together with a 1/4" seam. Then turn it clockwise so there are three closed sides in the pocket and one long open side.

Beat the pocket folds and remove the pins, then slide the raw top edge of the pocket to the long, open side of the pocket and pin. You'll notice that the pocket won't be all the way inside the pocket, that's ok! It will actually curve more at the end, which is good.

Sew the pocket face to face and the pocket together near the edge, removing pins as you sew.

Place the storage pocket on the header cover where you want the pocket to go. Optionally, you can highlight the pocket by sliding the zipper between the pocket and the cover. Then sew close to the edge to secure the pocket to the headboard cover, remove the pins as you sew.

Slide the cover onto the headboard.


You may choose to secure the cover to the headboard to counteract the weight in the pocket. Follow the instructions on the package to attach one side of Velcro (soft) to the back of the cover on the wrong side. Place a piece of painter's tape on the header to protect it from the Velcro adhesive. Attach a hook (rough) of Velcro to the painter's tape. Wait 24 hours for maximum retention, then attach the hook and loop fasteners together (Image 1). Since the cover is removable, it's a great and inexpensive way to decorate a child's room to fit her fancy (Image 2).