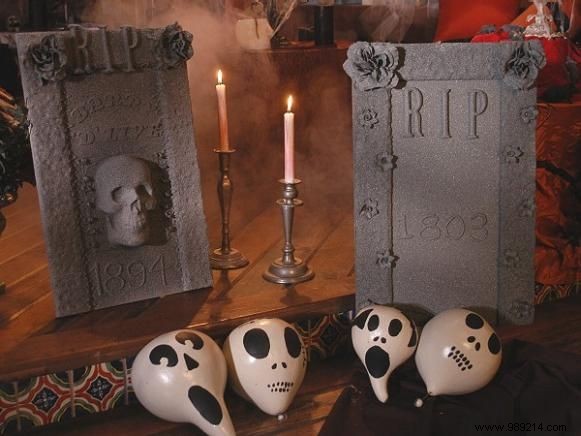
(2) pieces of 1/4" thick plywood, 14" x 24"
(2) 18" wooden garden stakes
18" wooden yard stake trimmed to 14" (cut off the spiked end)
(2) pieces of plastic foam trimmed to 14" x 3" (for the length of the headstone face)
(1) piece of foam plastic trimmed to 8" x 3" (for the top face of the headstone)
(2) strips of thin balsa wood 24" long and trimmed to 1-1/2" wide (for the sides of the headstone)
(2) large white silk roses
(10) smaller white silk flowers
Wooden letters spelling "R-I-P"
stone spray paint
pencil or pencil
hot glue gun and glue
1" long nails
hammer
1. Align the two spiked garden stakes on the bottom of the first piece of plywood leaving about 4" from the spiked tip hanging off the end and about 3" from each side lengthwise. Nail in place.
2. Align the clipped stake along the top edge of your headstone as a support beam. Nail in place.
3. Align the second piece of plywood on the existing base so that the stakes are in the middle of the plywood sandwich. Key in place. To ensure stability, nail the top plywood to each stake.
4. Glue the balsa wood around the two open edges. Don't nail, the balsa wood will split..
5. Hot glue the foam pieces to the face of your headstone, essentially creating a three-sided frame.
6. Hot glue the large silk roses to the top two corners of the foam on the headstone face.
7. Hot glue about five smaller flowers to the foam plastic strips that run down each side of your headstone.
8. Glue on the wooden letters to spell "RIP." Using a pen or pencil, write a date on the headstone.
9. Trace the written numbers using hot glue.
10. Once the glue has dried, spray the entire headstone (front and back) with the spray paint, making sure to get into the folds of the flower petals. Let the paint dry for 24 hours..